Share
Pin
Tweet
Send
Share
Send
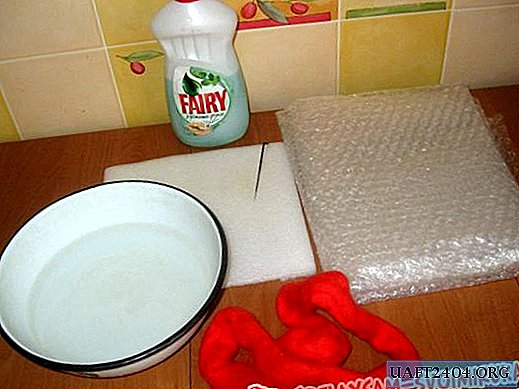
- Merino wool;
-Film with pimples for felting;
-Filting needle;
- Substrate under the needle for felting;
- A bowl of hot water;
- Soap or detergent.
Let's get started. I divide the process of felting beads into: dry and wet. Let's start with the dry. To do this, lay out the pieces of wool on the film so that it forms like a net.

Those. First, we lay the wool horizontally, and then vertically.

So do a few rows.


After this, we carefully give the resulting wool the shape of a ball.

Then we put the resulting air and light balloon on the substrate.

I have a piece of material resembling polystyrene as a substrate. After that, with the help of a needle for filting, we seal the ball.

We do this evenly from all sides, so that there are fewer creases on the bead. After the ball has slightly decreased in size, pour a little hot water into the bowl, add a little liquid soap, or detergent, as in my case.

Spread the ball on the film and slightly moisten with soapy water.

We do this so that the fibers of the wool soften and better adhere to each other. The felting time depends on how the wool lends itself to this process. I personally, most of all like to use Australian merino wool for this. Semenovskaya wool would be more suitable for felting bags and other dense products. We begin to roll the ball over the film with light movements. We try not to press too hard so as not to deform the bead too much.

We periodically add hot water to the bead so that the coat is hot and supple. After the ball is a little denser, we take it in our hands and begin to give it the shape of a bead with both hands, already pressing it a little harder and tightening it. We get such a bead.

As you can see, creases have formed on the bead, which we can easily hide with you. To do this, take a little merino wool and roll around its bead.

Wet with hot soapy water and begin to roll it to the bead. To do this, we take the bead in our hands and begin to roll on the film with intense movements until the top layer of wool is firmly attached to the bead.


Then we take it with both hands and begin to intensively shape the ball to our bead.

After which we get a bead without a single crack, pretty and neat.
We wash the finished bead under running water, continuing to wallow and compact it.

And now, our bead is ready.

Having made several of these beads in various colors, you can create exclusive designer jewelry.


Share
Pin
Tweet
Send
Share
Send

