Share
Pin
Tweet
Send
Share
Send
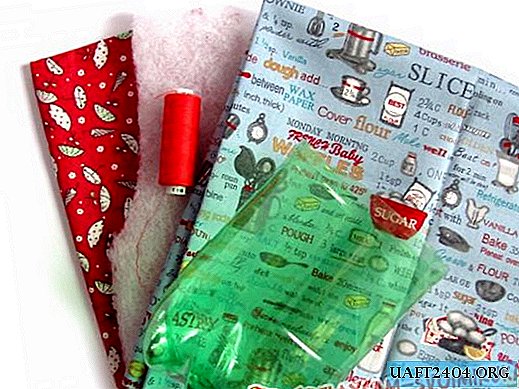
Modeling patterns. The water tank will be the main component of the cup. Textile parts must clearly fit its dimensions. In order not to make a mistake in cutting details and to choose the right size of cotton elements, measure the width of the neck and the height of the plastic cup.


In this case, it is 10 and 13 cm, respectively. Multiply the width of the cup (10 cm) by 3.14 and add 3 cm (10x3.14 + 3 cm = 35 cm), add half the diameter of the neck (10/2 = 5 cm) and 4 cm to the height of the cup (13 cm) (13 + 5 + 4 = 22 cm). Cutting and assembly of parts. From blue and red cotton, cut two rectangles measuring 35x22 cm.

Strengthen each part from the inside with non-woven fabric.

Take a cloth designed for the outside of the cup. Paste the synthetic winterizer, ironed through a damp cloth, to the inside.

Bend the fabric in the middle and lay a straight stitch on three sides.

Cut the synthetic winterizer with sharp scissors from the outside of the seam.

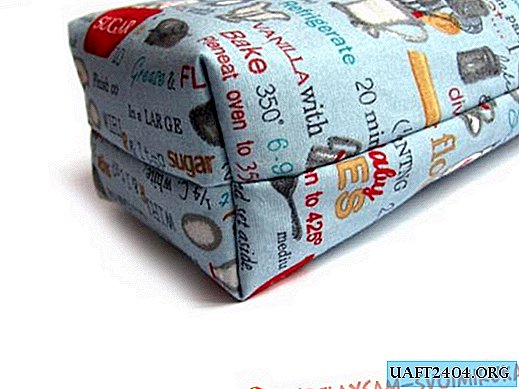
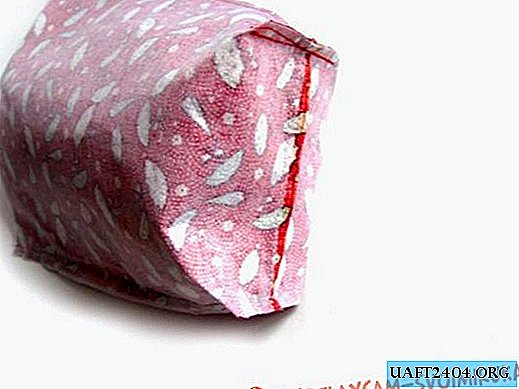
Grasp the corners and align the base seam and side seam.

Step back from the top of the corner 5 cm and lay a straight line, thereby forming the volume of the bottom. Similarly, process the second corner.

It should get such a glass.
In the same way, make an inner cover, but without syntepon.
These should be the main details of the cup at this stage.

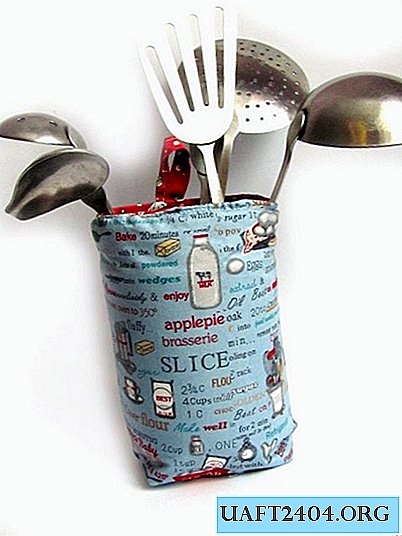
Insert a plastic container into the outer cup and the inner case into it. Bend the edges of the fabric blanks inward and secure them with tailor pins or a basting seam.


Make a loop of red cotton. Insert it between the parts. To complete the work, lay a straight or decorative stitch along the perimeter of the cup.
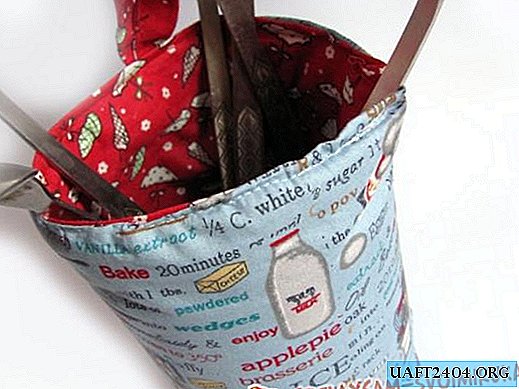
A textile cup for kitchen accessories is ready!
Posted by: Elena Tregub
Share
Pin
Tweet
Send
Share
Send