To make a simple game cube with your own hands, in addition to epoxy, you will also need a piece of thin plexiglass (the so-called plexiglass) with a thickness of about 1-2 mm. First you need to determine the size of the cube, after which we make the markup, and with the help of a clerical knife, we cut square blanks from transparent plexiglass.

The edges of the "pads" need to grind on sandpaper at an angle of 45 degrees. Then we put four small squares close to each other on the tape of adhesive tape. We turn the "roll" then so that all four corners are 90 degrees.
Then, using the same adhesive tape, we fix the bottom and the lid. The result was a cube of plexiglass. But this is only the first stage of work. Then it will be necessary to fill the resulting form with epoxy resin, and bring the game cubes to mind.

Work with epoxy
We grind one of the corners of the game die on sandpaper until a through hole is obtained in it. We make small sides of hot-melt adhesive. Whereas the remaining corners of the cube are simply “sealed” to exclude the possibility of leakage. Set the blank on plasticine.

At the next stage, we dilute the epoxy with the hardener, and type into the syringe. We put a needle on the nozzle of the syringe. We insert the needle into the hole, and fill the cube with epoxy. After the epoxy has solidified, cut the adhesive tape and disassemble the "formwork".

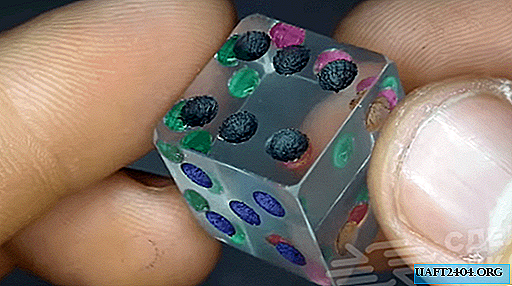
We paste masking tape on the cube, make markings with a pencil and drill holes (more precisely, small indentations), which are then painted over with a permanent marker.

For more information on how to make a simple epoxy game block with your own hands, see the video on the website.