Share
Pin
Tweet
Send
Share
Send
Necessary materials:
- sheets of paper in white, brown and yellow;
- voluminous double-sided tape on the foam;
- scissors;
- stapler with staples;
- clerical glue;
- black felt-tip pen;
- a simple pencil;
- ruler.

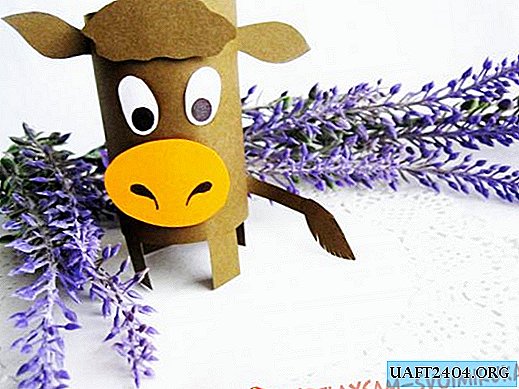
Stages of making a donkey from paper:
1. Like any donkey, our eeyore will have a brown body color. So you should take double-sided paper of this color and cut a 13 x 8 cm rectangle.

2. Next, we turn the rectangle into a tube with our fingers.

3. Holding the edges, fix them with a stapler.

4. Make the legs donkey. To do this, cut 4 stripes 1 x 2 cm.

5. Glue two strips in front in the inner part of the body, and the rest from the back.

6. We make a shaggy bang. Cut it out of brown paper. Glue on top of it a piece of double-sided tape on the foam.

7. Attach the bangs to the very top of the body.

8. From the white paper we cut out two small ovals. We will draw two circles on them with a black felt-tip pen. It turned out the eyes. Glue the finished eyes on the burro's body just below the bangs.

9. Cut a large oval from yellow paper. With a black felt-tip pen, draw the nostrils.

10. Glue on the body, pre-attaching a piece of double-sided tape on the back in advance.

11. Making the ears. To do this, draw the silhouette of the figure, as shown in the photo. Then carefully cut with scissors.

12. On the sides of the body from the upper side we make one cut.

13. Insert the ears.

14. It remains to make a donkey tail. So we take a sheet of brown paper and cut out two details: a thin strip and a figure in the form of a leaf.

15. Connect the figures together with glue. We attach the finished tail from the back of the body. So our donkey from colored paper is ready.


Share
Pin
Tweet
Send
Share
Send