Share
Pin
Tweet
Send
Share
Send
If you answered positively to all questions, then we are on your way. Going on a journey to create a gift, take with you only positive emotions, bright thoughts and, of course, love. And all because we will create a small and eloquent (And, yes, yes, red! - as Odessa residents would say) pillow for the beloved and dearest person.
What is useful to us for embroidery:
- floss of red color (2.5 skeins were enough for my picture 30 * 30 cm in size);
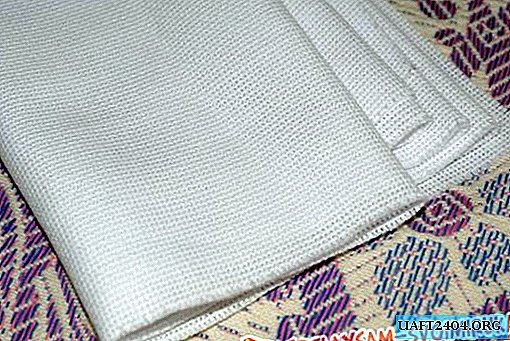
- white canvas (take the smallest canvas, the picture will look neater);
- needle for embroidery;
- embroidery scheme (I don’t propose my own scheme, since it was in a very low resolution and has undergone many transformations from me);
- ordinary needle;
- white and black threads.
For the pillow we take:
- white cotton fabric for a "breastplate";
- silicone and / or sintepon;
- red fabric for the back side of the pillowcase (I took crepe satin - it looks beautiful, but threads creep out on the rough edges. I advise you to check the red fabric for shedding ability.);
- secret snake of red color;
- pins;
- needles, white and red threads;
- preferably a sewing machine.
* I do not specifically indicate the size of the fabric, as the picture, canvas and pad can be absolutely any size. It is important to remember one thing: when working with cotton, add 1.5-2 cm to the seams, and with crepe satin - 4-5 cm.
Let's get down to business!
1. First of all, you need to choose a picture that will decorate your pillow. Fortunately, there are no problems with the choice of pictures on a romantic theme on the Internet. It is advisable to choose a square picture. Under the selected picture, we take the canvas, taking into account the allowance for seams from the edge of the picture - 3-5 cm.
2. For greater convenience in the embroidery process, I would advise you to sew a black thread with a size of 10 * 10 crosses in black thread. You can draw the grid with a pencil or pen, but then the free space will have to be embroidered in white.

3. After the picture for the front side of the pillow is ready, it's time to tackle the pillow itself. From white cotton fabric we sew a traditional "naprnik". In fact, this is an ordinary bag.

4. I used both synthetic winterizer and silicone. Take a synthetic winterizer of a rectangular shape.

5. From the synthetic winterizer we sew the bag to the size of the cotton bag.

6. Put the bag from synthetic winterizer into the “napernik” and fill it with silicone.

7. Sew the bag from synthetic winterizer. This trick will help us make the pillow perfect shape and prevent the silicone from rolling into lumps in the corners of the pillow.

8. We mark with pins the line of the future seam for the “napernik”.

9. I advise you to make a seam before stitching it completely.

10. Gently sew with white thread at the very edge.

11. Let's take a snake. Divide the fabric of the back side of the pillowcase into two parts. And on the side that was cut, trim the edges.

12. Bring the snake to the fabric.


13. The snake should not reach the edge of the pillowcase. Sew fabric from the wrong side.

14. Using pins, connect the front and back sides of the pillowcases as they should look at the finish. These pins will serve as a guide for the pillow at the end.

15. Difficulties for me began at the stage of stitching pillowcases. First, sew a pillowcase on the front side, moving away from the edge of the future pillowcase (from the line of pins) by 1-2 cm. That is, it is slightly wider than the area of the pillowcase. Turn inside out and sew along the line of the future pillowcase. And turn it back on your face. Thus, the edge of the fabric should be inside. If small threads stick out from the seams, carefully trim them with nail scissors.


The pillow is ready! Love you and sweet dreams!

Share
Pin
Tweet
Send
Share
Send